Creating a New Patient Folder using Quick Patient
Patient information can be entered quickly and accurately using Quick Patient by scanning a provincial ID card and having all information related to patient creation on one window.
Note: In Ontario, obtain the patient’s consent before obtaining their provincial ID card.
Say to the patient “I will be creating a profile in your system to fill your prescription and will need some personal information from you. I can do this accurately and quickly by scanning your health card and driver’s license, but this means that your health card number will be stored in our system. Is that okay? I can also collect this personal information manually.” If the patient agrees, proceed to create a new Patient Folder using Quick Patient.
To create a new Patient Folder using Quick Patient:
- Select the Patient navigator button. The Patient Search window appears.
- Select Quick Patient.

The Barcode Scan window appears.
- Scan the barcode on their ID with the hand scanner.
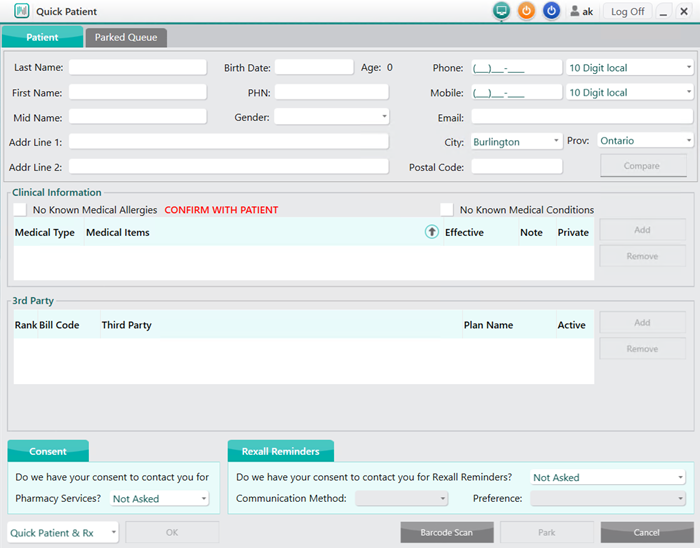
- Select OK. The Quick Patient window opens.
Note: Alternatively, select Park to store the information and create the new Patient Folder at a later time. For more information, see Park.
- Enter the following information, if not captured by the identification scan:
- Patient demographic information
- Clinical Information
- 3rd Party information
- Consent
- Rexall Reminders
- From the Quick Patient drop down, select Quick Patient & Rx.
- Select OK. The new Patient Folder is saved and a New RX window appears. The Patient field is automatically populated with the patient information entered from the Quick Patient window.
Note: If the Rexall Reminders section dropdowns are not updated from Not Asked, a Compliance Communication Prompt will display to encourage you to enroll the patient in the Rexall Reminders program. For more information, see Compliance Communication Prompt.